It is crucial to decide what you want to achieve with the reverb before choosing any plugin.
You need a good intent to get the best results.
Think about how the reverb makes you feel instead of focusing on how it sounds.
Sometimes you might go for something that’s natural, lush, or intimate.
The tempo of the song also plays a big role when it comes to how long or short the reverb should be.
These days engineers use calculators to determine the size of the reverb.
I don’t use that approach since it defeats the purpose of using reverb to create depth and contrast in a mix.
Instead, allow the instrumentation to guide you into choosing the perfect feel for your vocal reverb sound.
For instance, if you’re working on jazz or classical piece, an organic and subtle reverb will often be the best choice.
On an RnB or Neo-Soul vibe then a lush and long reverb is usually what most engineers will go for since the tempo of the music is slow.
Just be careful not to drown the vocal into the reverb when going for a lush sound.
At times you might go for the opposite on an RnB or any ballad song and go for intimacy instead of a long reverb to keep the vocals upfront.
This happens mostly if the instrumentation is dense, a lush reverb normally reduces transients which makes the voice sound smoother, this can make it harder for the vocal to cut through.
When you want the vocal to cut through a dense mix then an intimate and punchy reverb sound is regularly the best option.
So, think about how you want the voice to feel in the mix then use reverb to create that emotion.
But if you want to rely on math then feel free to use a calculator.
How to Use Reverb On Vocals
Let’s look at a few vocal reverb tips that you can use to get a perfect mix.
But first, we'll look a the most frequently asked question...
What is vocal reverb?
Vocal reverb is a vocal effect that makes a singer’s voice sound as if it is coming from a large, empty space.
Reverb is a crucial part of the sound of many music genres, including pop, blues, and rock.
There are two main types of vocal reverb that are used commonly in music: artificial reverb and natural reverb.
Artificial reverb is created by using an effects device (typically an audio plugin) to create a simulated version of the reverberation that occurs naturally in large spaces.
It can simulate many types of acoustical environments, including halls, cathedrals, and chambers.
Natural reverb is created by using a microphone to record the natural reverberation of a singer’s voice in an actual large space.
This can be done by recording the voice in a room, hallway, or cathedral.
Natural reverb is usually preferable to artificial reverb because it sounds more organic and authentic.
However, it can be difficult to find a large enough space that is acoustically suitable for recording vocals.
This is usually the main reason a lot of people use a reverb plugin because it's much easier to access.
Plugin companies have come a long way to give us the best tools for audio engineers to get a great sounding vocal reverb sound in our mixes.
Here are a few tips that will help you get that perfect vocal reverb sound you hear on some of your favorite mixes.
1. Using the Abbey Roads Vocal Reverb Trick on Vocals

The classic Abbey Road Reverb trick is one of the most straightforward ways to free up space in a mix so that the song doesn’t get overwhelmed by reverb.
Another great thing is that it’s flexible, so once you understand it then you can manipulate it till you come up with something unique.
Here’s how you can set it up.
The first thing you’ll need to do is to send your vocal to an Fx/Aux channel.
Using an Fx channel gives you more control over the effect as compared to inserting the reverb directly on a vocal channel.
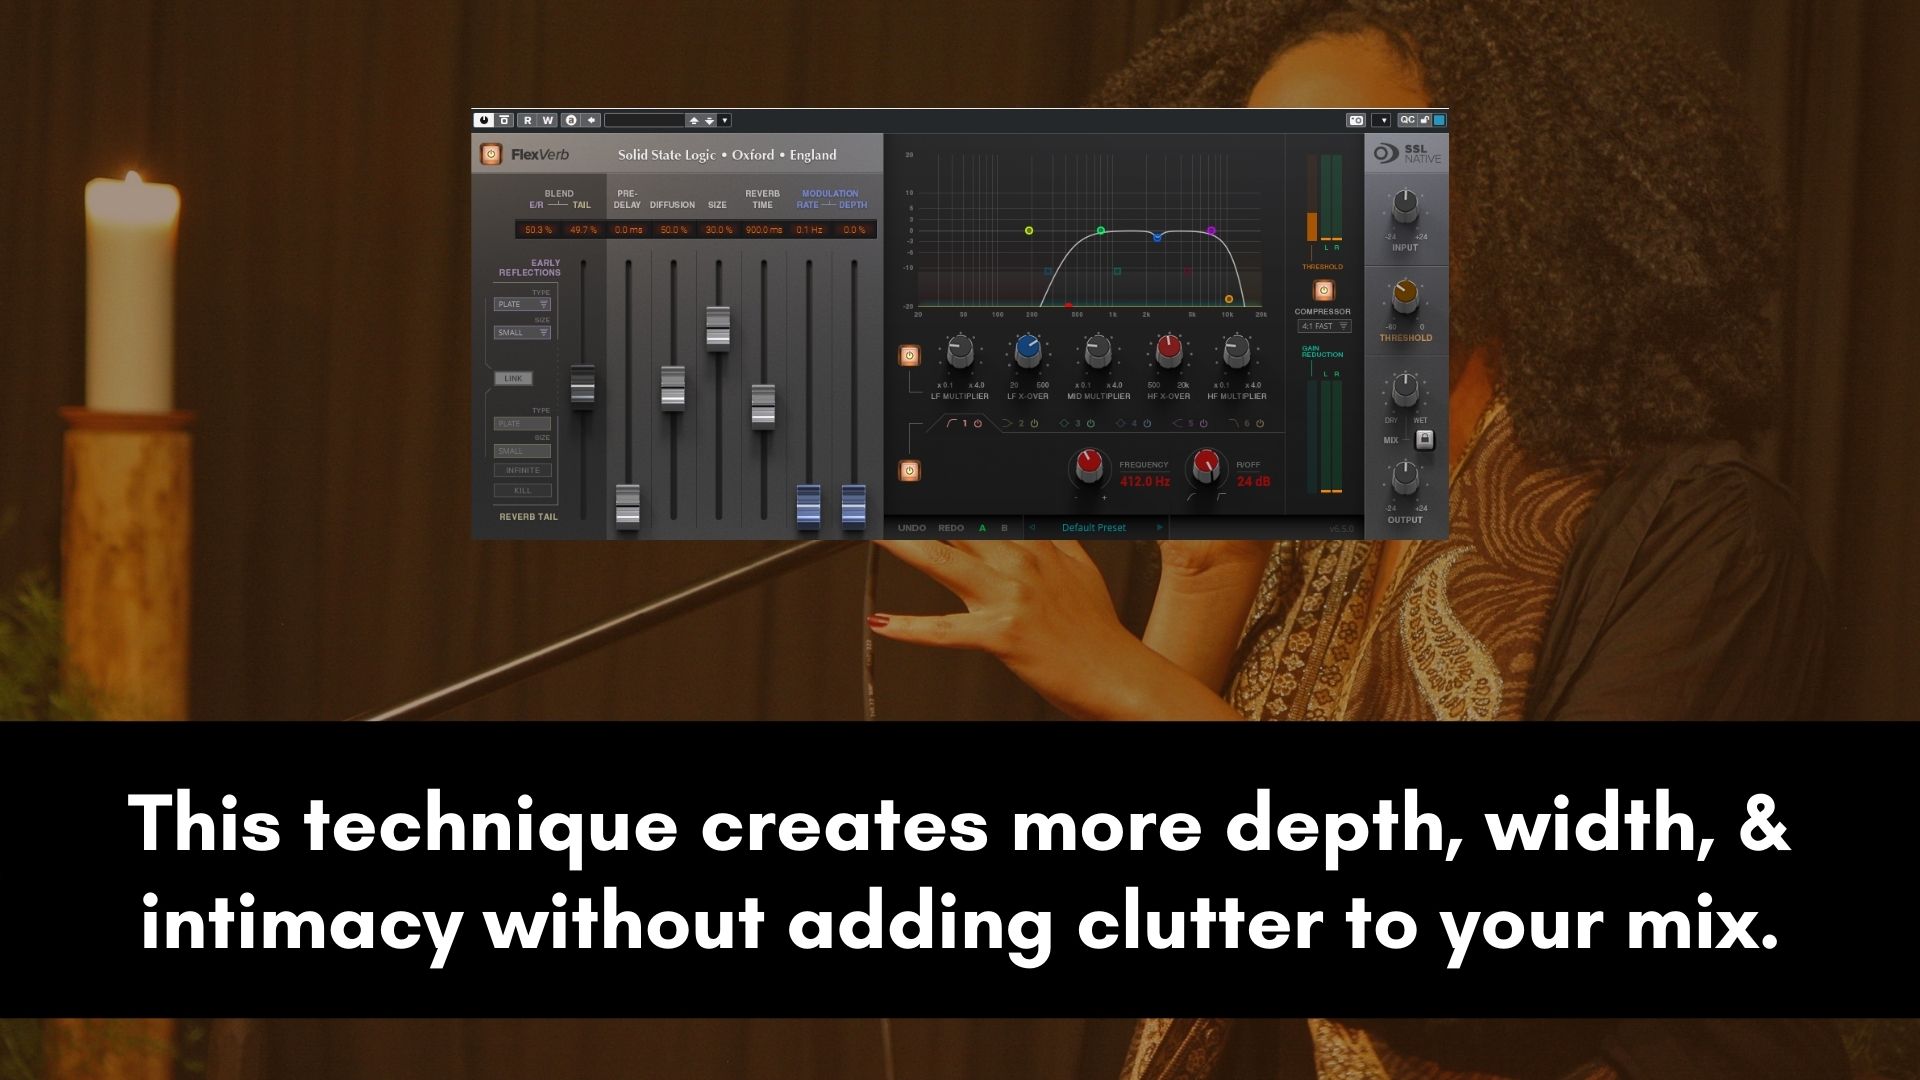
On the first insert slot of the reverb channel, I add an EQ, preferably something stock and simple (basically, a plugin that’s CPU friendly).
The reason I add the EQ before the reverb is because I want to EQ the original signal, not the reverb signal.
However, feel free to experiment with the EQ before and after the reverb then choose what sounds best for your project.
The EQ settings are really simple. Most people will create an HPF (high pass filter) and an LPF (low pass filter).
The goal is to cut everything that’s below 400-600Hz and 10kHz. Basically, you’ll create an HPF around 600Hz and an LPF around 10kHz.
Most of the time (not always) I use shelf filters because I prefer to reduce the amount of reverb in those frequencies rather than cutting them out.
But always experiment and choose what you like best.
Sometimes this effect might increase some harshness of a voice, to fix that you can create a small cut in the upper mids (around 2kHz) to get a cleaner sound.
Next up you’ll need to choose your favorite reverb plugin.
Finally, play around with the reverb settings till you find what works best for the particular voice that you’re working on.
Every project has a different feel and tempo, so there’s no one-size-fits-all.
Use the Abbey Road vocal reverb trick if you want to achieve an intimate vocal reverb sound.
The results will usually create more depth, width, and intimacy without adding clutter to your mix.
2. Make Vocals Bright and Wide With Plate Reverbs

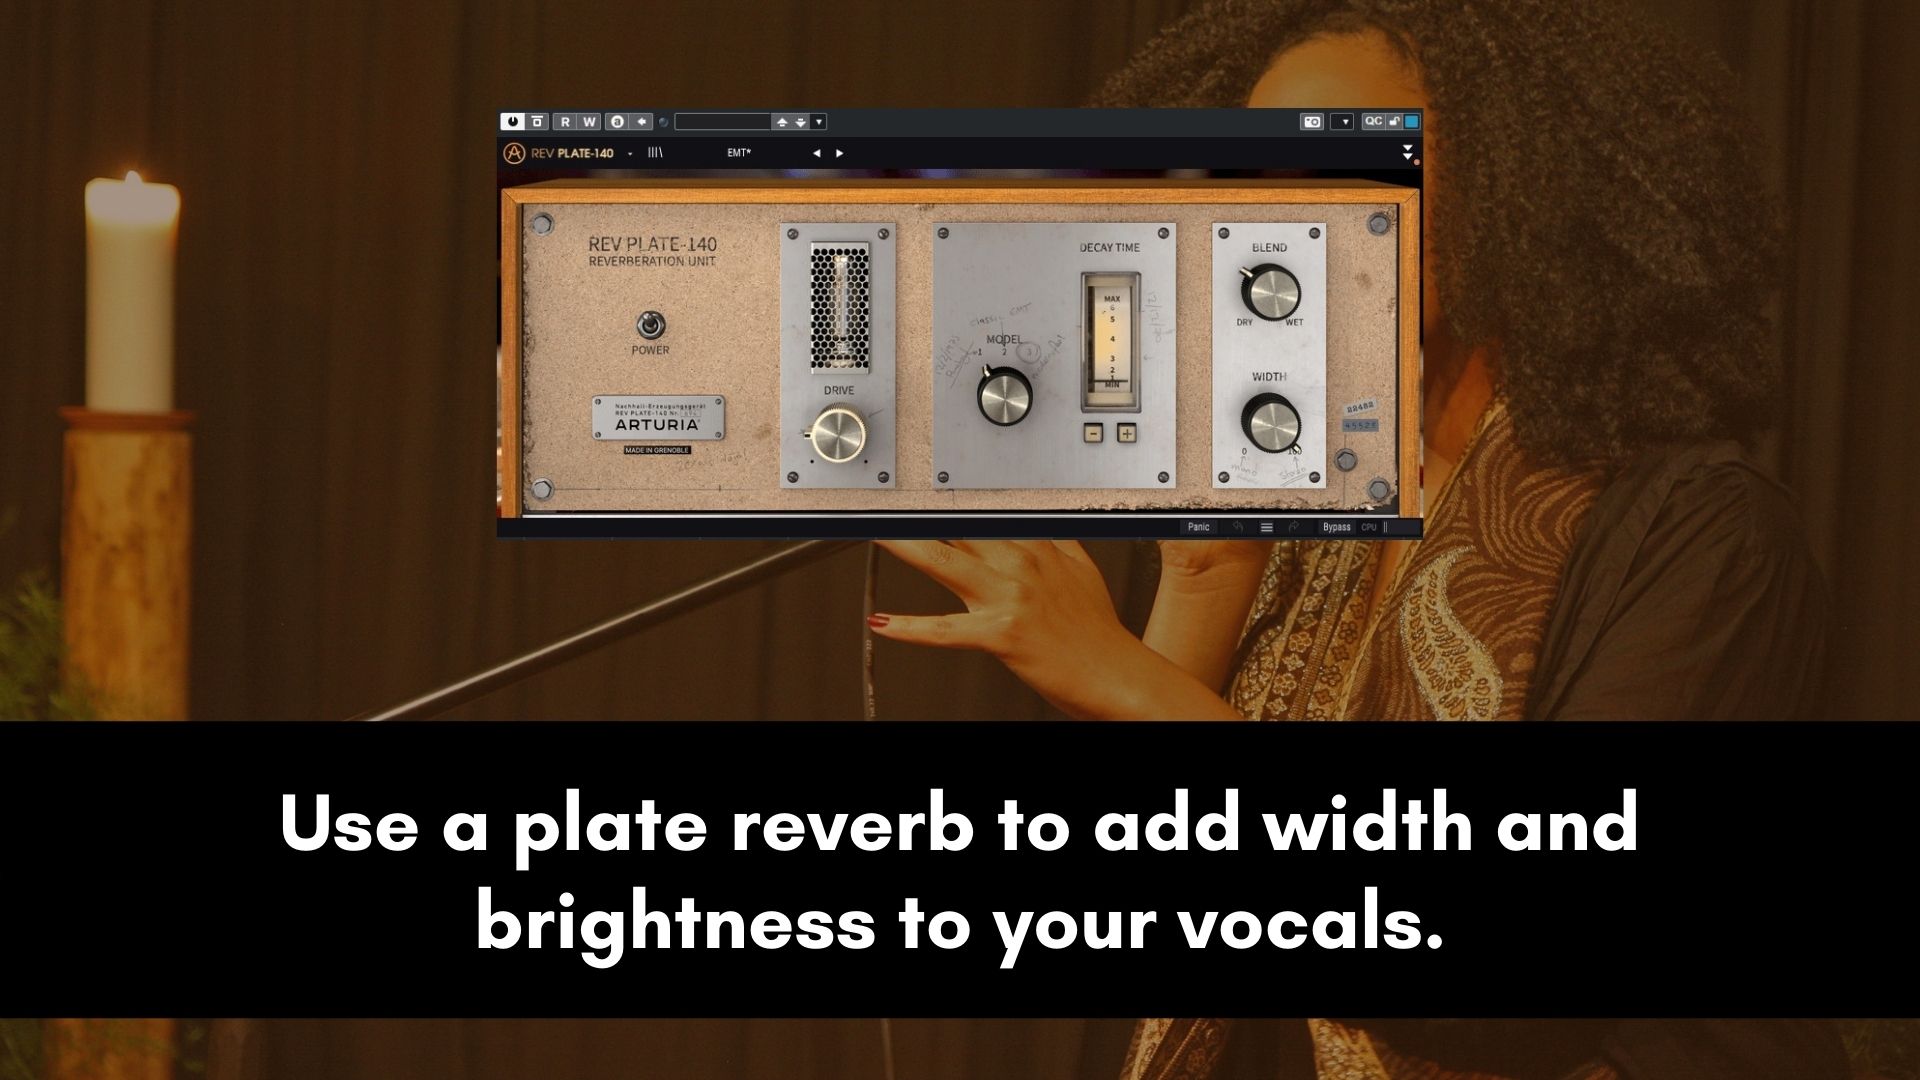
If you’re working on a dark and narrow-sounding vocal but want to make it sound bright and wide then a plate reverb is often the best choice.
This is because plate reverbs sound bright naturally and they tend to add a bit of width.
Since a plate is normally short it will give you a great sound that’s not washed up.
But that doesn’t mean you always have to use a plate, you can use any type of reverb together with an EQ and a stereo plugin.
However, be very careful when using stereo plugins on an Fx/Aux track because they usually cause phase issues.
So, if you do choose to use them, just make sure that the effect is as subtle as possible.
One of my favorite plate reverbs at the moment is the Rev PLATE-140 by Arturia.
The plugin also comes with a “width” knob to control how wide you want the reverb signal to be plus a distortion parameter to add upper harmonics for brightness.
I haven’t found any plate reverb that sounds as good as this one.
Download the Rev PLATE-140
3. Adding Warmth and Density to a Voice

In some situations, you might find that the instrumentation is overpowering the vocal and making it sound too thin.
Sometimes it’s just because the vocalist has a small children’s voice.
In this part of the tutorial, I’m going to share with you a technique that you can use to add warmth and density to a thin voice.
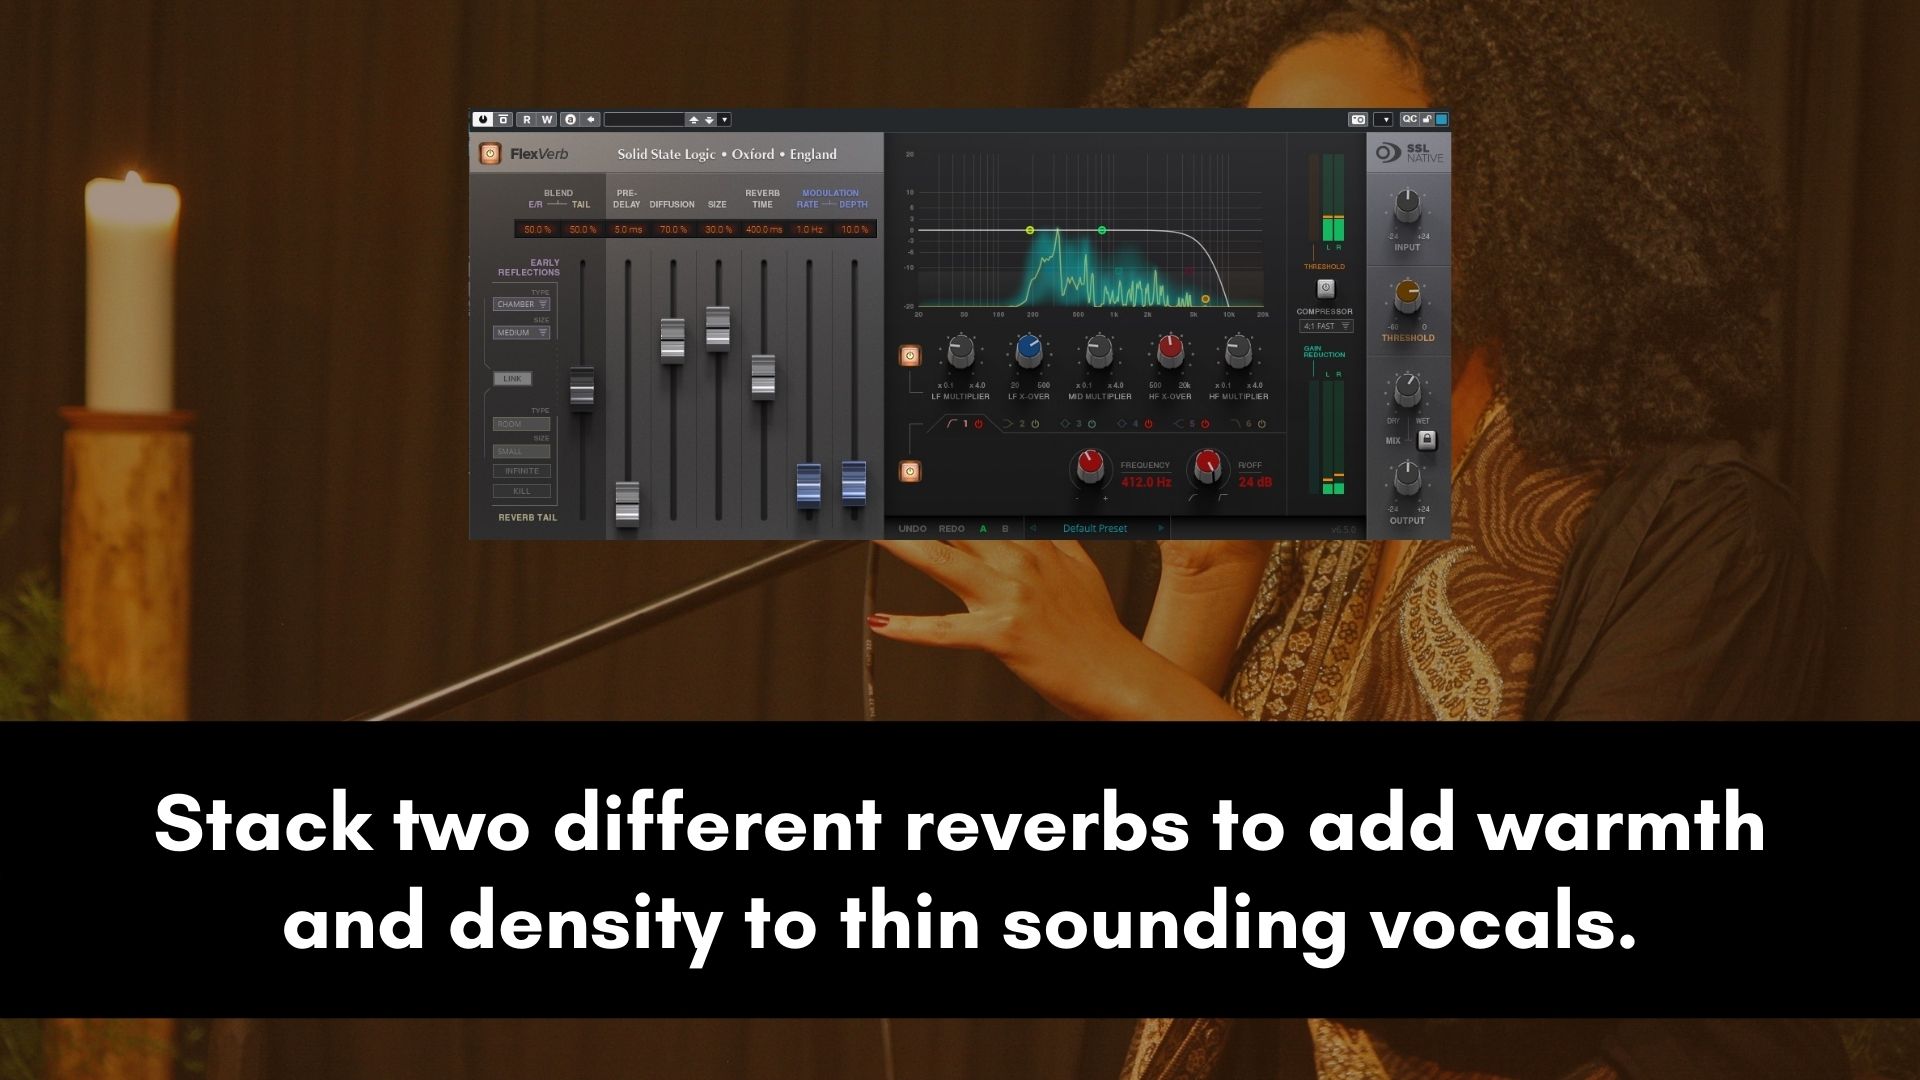
To get a vocal to sound larger and thick there are a couple of techniques you can use, but the most common one is to stack 2 different reverbs.
Mostly I’ll use a room together with a chamber.
The good thing about a room reverb is that it adds liveliness to the vocals and sounds natural.
The chamber often boosts the lower midrange, which normally results in a dense and thick reverb sound.
You can choose to have these 2 reverbs on different Fx channels for more flexibility or stack them one after the other in a single Fx channel.
I always have them on 2 separate channels because I love having more control over the reverb signals.
Adding a tape saturation plugin on the reverb tracks can also make them sound warmer and make the reverb sound expansive.
Another trick is to use a high-shelf cut around 8kHz to reduce the top-end on the reverbs.
This is done so that the reverb doesn't make the vocal sound bright and defeat the goal of getting that warm and rich sound.
Once you’ve got the reverb settings that work well for your project then just blend to taste, there’s no right or wrong.
As long as it sounds good without making the mix sound muddy or boxy.
4. Reverb and Delay on Vocals
If you’re working on a slow tempo song like RnB, ballads, Neo Soul, etc. then a long and lush reverb usually sounds amazing.
To get this sound you’ll need to use a delay in the reverb.
This simply means having the delay before the reverb instead of the other way round.
This will reverberate the delay signal to make it sound lush and add excitement.
The effect also works great on a thin-sounding voice to make the vocal sound thick.
You have to be careful of the reverb tail when using this technique because it can muddy up the mix if the decay time is too long.
I always EQ the delay signal so that it doesn't overpower the original vocal.
Having the delay and original signal sounding identical sounds boring, make them different with EQ to create contrast and make the delay sound exciting.
I would recommend using this technique on sparse arrangements and slow tempo songs.
Using it in a fast and dense arrangement will just sound messy and amateur.
5. Automating Your Reverbs
This is the part that separates the Pros from the amateurs. Beginner engineers tend to skip automation.
I guess it’s because this is not an exciting topic to talk about and there’s no right or wrong way to do it, so that makes it a bit hard to teach.
It also differs from song to song.
So, what works for one singer might not work for every project that you work on.
However, automating your reverbs is one of the most important steps of mixing a song.
For me, the main goal of automating the vocal reverb is to create depth and contrast.
This also adds excitement and can make it easier for the listener to distinguish between different parts of the song.
One way to use automation is to expand the chorus parts.
Basically, you add less reverb on the verse (and other parts of the song) and then have more reverb on the chorus to make it sound bigger and more open.
Don’t make it sound too obvious though, the listener just has to feel it but be unable to put a finger on it.
I remember an old friend telling me that the chorus parts on my mixes sound bigger all the time and when I showed them the automation they were disappointed because they expected something magical.
So, play around with automation to keep the listener glued to their speakers or headphones.
Bonus: Use a spring reverb to add rhythm to supporting vocals.
To enhance the groove and rhythm for the vocals what you can do is to go crazy and use a spring reverb.
I wouldn’t recommend you to use this technique on the lead singer, instead use it on the supporting vocals (mostly backings and adlibs).
The spring reverb is mainly created for electric guitars and it sounds amazing on guitars.
But to stand out and be creative you have to bend the rules sometimes.
A spring reverb tends to increase presence and dimension which can sound great on supporting vocals.
Try it and maybe you might like it.
Wrap
For you to get the best vocal reverb sound, you need to have good intentions and do what benefits the vocals.
A lot of beginner mixing engineers mess up because they want to use every trick they learned from Youtube on one project.
For instance, I’ve seen someone using a thick chamber reverb on a deep voice.
That’s a recipe for disaster because that reverb just added mud to the mix.
So, for a deep vocal tone, you’ll mostly need to use a bright reverb which will boost the vocal presence and help it cut through the mix.
Then do the opposite for a vocal that’s bright or thin sounding.
What I mean is that once you have the right intent half of the battle has been won, you won't find yourself wasting time trying to get the right settings or choosing the right type of reverb.
Everything will be much easier because you already know what you want to achieve..
Obviously, there are many other ways to use reverb on a vocal but the tips above should give you a strong starting point and you can build on it to add your own fingerprint.
I wish you all the best in your mixing journey.
Please leave a comment below to let me know if you're excited to try all these techniques.