You open the session, and the vocal is a mess before you have touched a single fader. Eight takes scattered across eight tracks.
Clicks between phrases. One line that drifts flat. A breath right before the hook that is louder than half the words around it.
So you spend 20 minutes cleaning instead of mixing, and the focus you needed for real mix decisions is already gone.
The fix is vocal prep. It is the unglamorous round of comping, editing, tuning, and gain staging you do before the first plugin goes on the chain.
Skip it, and every mix move fights a problem you should have solved earlier.
Do it properly, and the mix gets faster and cleaner because your time goes into making the voice sit instead of patching holes.
Here is the full checklist to prepare vocals for mixing, step by step, in the order a pro session actually runs.
TL;DR
- Prep runs in order: organize, comp, clean, time-align, tune, control breaths and sibilance, even out peaks, gain stage, then print stems.
- Comp first. Build one strong lead from your best takes before you edit anything else.
- Edit clean. Remove noise, clicks, and dead silence, then nudge late or early words into the pocket.
- Tune in production, not mid-mix. A flat note never sits, no matter how good your EQ is.
- Use clip gain, not compression, to even out levels so the compressor gets a consistent signal later.
- Gain stage so the loudest phrases peak around -6 dBFS with an average near -18 dBFS, then export 24-bit stems from the top of the session.
Keep reading to get a repeatable prep routine for clean, consistent vocal every time, so the mix is about balance and tone instead of damage control.
Why Vocal Prep Comes First
Mixing and prep are two different jobs, and trying to do them at the same time is why so many vocals never sit right.
- Prep is about removing problems.
- Mixing is about shaping what is left.
When you blur the two, you end up reaching for EQ to fix a timing issue or compression to hide a loud breath, and neither works.
A late word is still late after you boost the highs. A loud breath is still loud after the compressor grabs it, just loud and squashed.
There is a workflow reason too.
Cleaning and tuning is tedious, detailed work that drains the exact kind of attention you need for creative mix decisions.
Get it out of the way in its own pass, take a short break, then come to the mix fresh. Pro studios treat prep as a distinct stage for this reason.
Organize and Back Up the Session First
Before you change anything, protect the originals.
The single worst feeling in prep is realizing you have edited over the only clean take of a line and there is no way back.
Two minutes of housekeeping now saves you from that, and it makes the rest of the checklist faster because you can find every track at a glance.
- Back up the raw takes to a separate drive or cloud folder before the first edit.
- Duplicate the session or the vocal tracks so you can always revert to the untouched recording.
- Label and color-code every track: lead, doubles, harmonies, ad-libs. Future you will thank present you.
- Group related parts so doubles and stacks move together when you edit.
Comp the Best Takes Into One Lead
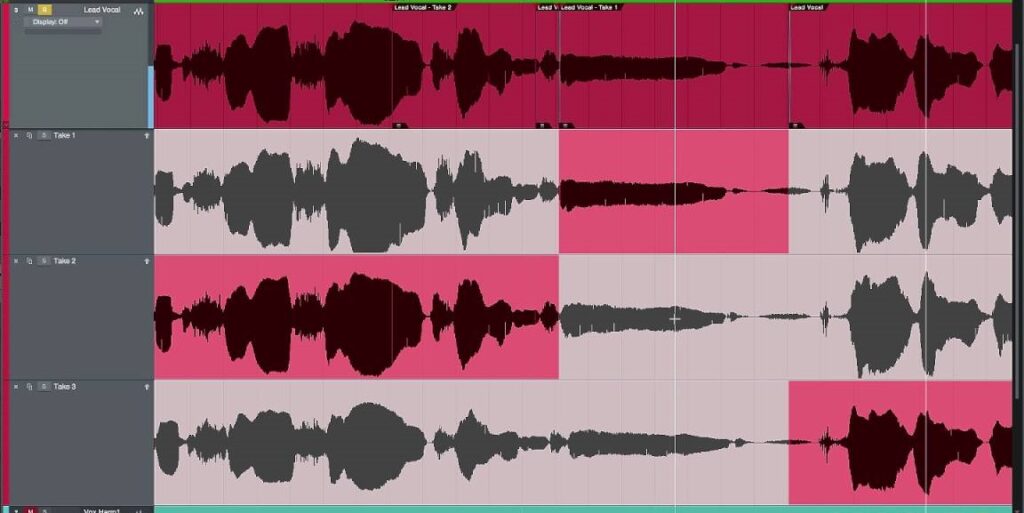
Comping is the process of building one final lead vocal from the strongest moments across all your takes.
This is the foundation of the whole prep stage, because everything after it (timing, tuning, level control) gets done on this single, committed performance.
A great comp can carry a song. A lazy one leaves you fighting weak phrasing for the rest of the mix.
Listen through each take and choose the best line, or even the best word, from each one. Favor pitch and emotion first, then phrasing, then tone.
Most DAWs let you stack takes in a single track lane or playlist so you can audition them quickly and swap regions without losing track of which take is which.
Once the lead is comped, line up your doubles and harmonies so their consonants and word endings hit at the same moment as the lead.
Tight stacks are the difference between a thick, intentional sound and a smeared one.
Sort Out the Supporting Vocals
The lead is only one of your vocal tracks.
Doubles, harmonies, and ad-libs each need a quick prep pass of their own, and deciding how they sit in the stereo field now saves a lot of confusion once the mix gets busy.
Settle the supporting parts before you start balancing, and the whole vocal comes together faster.
- Keep the lead mono so it stays punchy, centered, and upfront. It is the anchor everything else hangs off.
- Spread doubles and harmonies in stereo, panned in pairs or hard left and right, so they widen the sound without crowding the lead.
- Rough-balance the supports under the lead so they support rather than compete, even before you touch a mix fader.
- Commit ad-lib placement so each one has a clear moment instead of cluttering the verse.
None of this has to be final.
You are just making the early decisions that stop the supporting vocals from turning into a mess of overlapping tracks the moment you open the mix.
The tight alignment you set here is what pays off later, when mixing vocal harmonies turns those stacks into one thick, intentional part.
Clean Up Noise, Silence, and Clicks
Even a well-recorded vocal picks up junk: mouth clicks, chair creaks, a faint hum, the room tone bleeding into the gaps.
None of it helps the mix, and all of it gets louder the moment you add compression and reach for the high shelf.
Clean it now, while the track is quiet and easy to read, not later when it is buried under plugins.
A dedicated repair tool handles steady background hum and broadband noise well, while clicks and one-off noises are often faster to fix by zooming in and editing the waveform by hand.
- Strip the silence between phrases so no background noise or bleed sneaks through the gaps.
- Remove clicks and mouth noises with a dedicated repair tool or by editing the waveform directly.
- Fade every edit. Add short fades at each cut so you never hear a click where two clips meet.
- Tame the worst plosives by hand with a quick high-pass or a volume edit on the offending word.
Tighten the Timing
Timing problems read to the listener as sloppiness, even when they cannot name what is wrong.
A lead that rushes the verse or a double that lags behind the lead robs the vocal of confidence.
The goal here is not to quantize the life out of the performance but to nudge the words that are clearly out of the pocket back into place.
Focus on word endings and consonants, since those are what the ear locks onto.
Pull late words forward, push early ones back, and pay special attention to doubles and harmonies against the lead.
Most DAWs have a flex or elastic audio mode that lets you drag a single syllable into place without cutting the clip, which keeps the edits invisible.
Leave a little human looseness in.
Perfectly gridded vocals often sound stiff, and a touch of natural push and pull is part of what makes a take feel alive.
Tune the Vocal

Pitch correction belongs in prep, not in the middle of the mix.
An out-of-tune note is almost impossible to seat in a mix no matter how good your EQ and compression are.
Tuning changes the tone slightly, so you want it locked before you start shaping the sound.
How much you correct is a taste call, from transparent touch-ups to an obvious tuned effect.
- Tune the lead first, then match doubles and harmonies to the corrected lead.
- Correct in production or prep, so the tone is settled before mix plugins go on.
- Watch for artifacts. Heavy correction on a wide interval can add a robotic warble; back off the speed if you hear it.
- Match the genre. A pop or rap vocal can take obvious tuning, a folk vocal usually wants it invisible.
Tame Pops, Sibilance, and Breaths
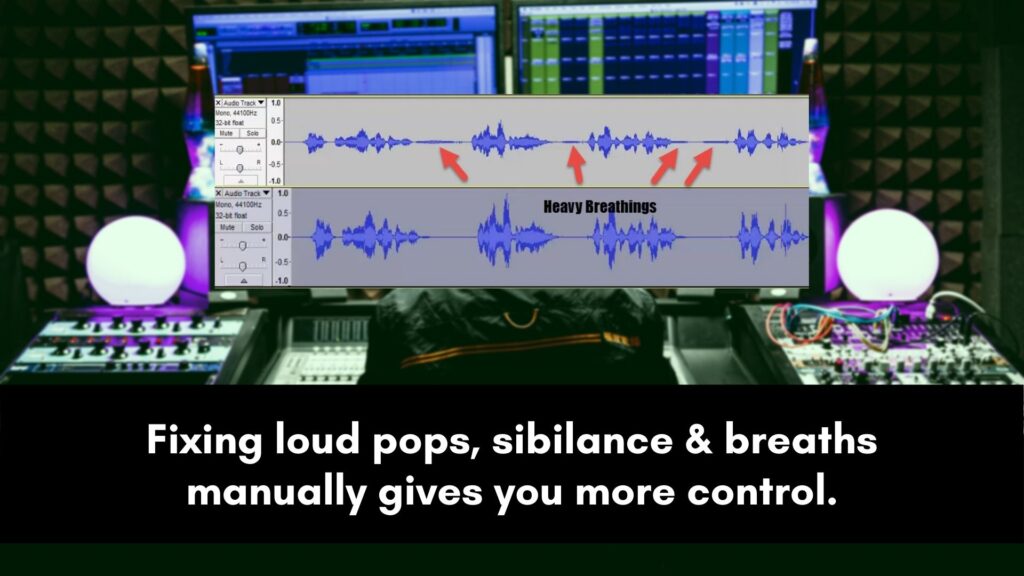
This step is about controlling the parts of a vocal that turn harsh or distracting once the track gets louder.
Plosives thump, esses hiss, and a loud breath before the hook can jump out further than the words.
Handling the worst of it now, by hand, means your mix processing has far less to fight.
Reduce loud breaths with clip gain rather than deleting them, since breaths are part of a natural performance, and cutting every one makes a vocal sound robotic.
For harsh esses, a quick volume edit on the offending syllable works in prep, and you can follow it with a dedicated de-esser during the mix for the consistent stuff.
Keep the quieter breaths. They add life and human feel.
Control Peaks With Clip Gain
Raw vocals are wildly uneven. One word whispers, the next one shouts, and that gap can be 10 dB or more.
If you hand that to a compressor untouched, the compressor has to work overtime, and you hear it pumping.
Clip gain is the fix: a clean, pre-fader volume edit that evens out the performance before any dynamics processing.
Go through phrase by phrase and bring the quiet words up and the loud words down until the waveform looks more consistent.
Aim to get every word within roughly 3–4 dB of the loud passages. This is not compression, and it does not replace it.
It just hands the compressor an even starting point so the vocal compression you add in the mix can shape dynamics musically instead of chasing peaks.
Gain Stage and Print Clean Stems
The last prep job is to set a healthy level and bounce the vocal into stems your mix session can trust.
Gain staging matters because analog-modeled plugins are calibrated around a specific input level, and slamming them too hot changes how they behave.
Set the level once, here, and the rest of your chain stays predictable.
| Stage | Target | Why it matters |
|---|---|---|
| Loudest phrases (peak) | around -6 dBFS | Leaves headroom for plugins and the master bus |
| Average level | around -18 dBFS | Matches the classic 0 VU level analog-modeled plugins expect |
| Quiet words (clip gain) | within 3–4 dB of the loud words | An even signal before the compressor ever touches it |
| Stem export | 24-bit WAV, from bar 1 | Stems import perfectly lined up and stay clean |
When you export, print from the very start of the session so every stem lines up on import, turn off normalization, and bypass any master bus processing.
Once your stems are sitting at a healthy level, the first real mixing move is usually subtractive EQ, and how to EQ vocals like a pro picks up exactly where this checklist ends.
The Complete Checklist to Prepare Vocals for Mixing
Here is the whole routine in one place.
Run it top to bottom every time and you will never sit down to mix a messy vocal again.
Each step builds on the one before it, so resist the urge to jump ahead to the fun parts.
| Step | Action | You are done when |
|---|---|---|
| 1. Organize | Back up raw takes, duplicate the session, label and color-code tracks | Originals are safe and the session is tidy |
| 2. Comp | Build one lead from the best takes | You have one continuous, believable lead vocal |
| 3. Clean | Remove noise, clicks, and dead silence; fade every edit | Only the wanted sound remains |
| 4. Time | Nudge late or early words into the pocket | Phrasing feels tight but still human |
| 5. Tune | Correct the lead, then match doubles and harmonies | Pitch is solid across the section |
| 6. De-breath / de-ess | Lower loud breaths and harsh esses by hand | Nothing distracts from the words |
| 7. Clip gain | Even out loud and quiet words | Peaks look consistent across the track |
| 8. Gain stage | Loud phrases near -6 dBFS, average near -18 dBFS | Healthy level with plenty of headroom |
| 9. Print stems | 24-bit WAV from bar 1, no normalization | Stems import lined up and clean |
Frequently Asked Questions
A few questions come up again and again when producers tackle vocal prep for the first time.
Here are the quick answers to the ones that decide how clean your starting point really is.
What does it mean to prepare vocals for mixing?
Preparing vocals for mixing means getting the raw takes ready before any mix plugin goes on.
You comp the best takes into one lead, remove noise and clicks, tighten timing, correct pitch, control loud breaths and sibilance, even out peaks with clip gain, and gain stage to a healthy level.
The goal is a clean, consistent vocal so the mix is about balance and tone, not repair.
Should you tune vocals before mixing?
Yes. Tune during production or prep, not in the middle of the mix.
An out-of-tune note is hard to seat no matter how good your EQ and compression are, and pitch correction changes the tone slightly, so you want it locked before you start shaping the sound.
Tune the lead first, then bring any doubles and harmonies into agreement with it.
What vocal level should you aim for before mixing?
Aim for the loudest phrases to peak around -6 dBFS with an average near -18 dBFS.
That mirrors the classic 0 VU gain staging standard and gives analog-modeled plugins the level they expect.
It also leaves plenty of headroom on the channel and the master bus, so nothing clips once you start stacking EQ, compression, and saturation.
Should you remove all breaths from vocals?
No. Breaths are part of a natural performance, and cutting every one makes a vocal sound robotic.
Reduce only the breaths that are distractingly loud, usually the ones right before a big phrase, by lowering their clip gain a few dB rather than deleting them.
Keep the quieter breaths, since they add life and a human feel to the take.
What export settings are best for vocal stems?
Export stems as WAV at the session sample rate and at least 24-bit.
Print from the very start of the session so every stem lines up when imported, turn off normalization, and bypass any master bus processing.
Keep the effects you committed to on purpose, but bounce dry wherever you want to keep mix flexibility later.
Do you compress vocals during prep or during the mix?
Use clip gain during prep to even out big level jumps and save real compression for the mix.
Clip gain is a clean, pre-fader volume edit that gives the compressor a more consistent signal to work with.
You then reach for the compressor during the mix to shape dynamics and help the vocal sit. Doing both at the wrong stage usually leads to over-compression.
The Bottom Line
Vocal prep is not the glamorous part of making a record, but it is the part that decides whether the mix is smooth or a fight.
Comp a strong lead, clean the track, tighten timing, tune, control the harsh moments, even the levels with clip gain, and print stems at a healthy level.
Do that in order, and you hand yourself a vocal that is ready to shape rather than rescue.
Prep is only the starting line of the vocal chain. With clean stems in hand, the shaping begins.
EQ carves the tone, compression seats the dynamics your clip-gain pass setup, and a little reverb on vocals places the dry, prepped take into a believable space.
The complete mixing vocals guide maps every one of those stages in order, from tone to space to glue.