You solo the vocal, and it sounds great. Then you drop it into the mix, and it vanishes.
Boxy in the verse, harsh on the loud notes, somehow muddy and thin at the same time.
So you start boosting and cutting at random, and 30 minutes later the vocal sounds worse than when you started.
Sound familiar?
The fix is not more EQ. It is the right EQ, in the right order. You cut the problems first, then shape the character, and you let the vocal tell you where the trouble is instead of guessing.
This is how to EQ vocals like a pro, step by step. It starts with a clean recording and surgical cuts to kill the problems.
Then a logical order to work in, tonal moves that add presence and air, and a frequency reference you can keep next to your DAW.
TL;DR
- Record clean first. EQ shapes a good source, it cannot rescue a bad one.
- Cut before you boost. High-pass, then remove mud (250 Hz to 500 Hz), boxiness, nasal tone, and harshness (3 kHz to 5 kHz).
- Work in order: fix problems first, shape tone second.
- Shape character with gentle boosts: clarity (900 Hz to 1.5 kHz), presence (4.5 kHz to 9 kHz), air (10 kHz to 16 kHz).
- Handle sibilance with a de-esser or dynamic EQ, never a fixed cut.
- Carve space by sidechaining an EQ dip on instruments that fight the vocal.
Keep reading.
By the end of this post you’ll have a repeatable order to follow and a band-by-band reference, so EQ becomes a series of decisions instead of a guessing game.
Start With a Clean Recording
No amount of EQ fixes a bad recording, so the pro version of this step happens before the plugin even opens.
A vocal captured with good mic technique in a controlled space needs only light EQ.
One recorded too close, in a boomy room, or with a harsh mic will fight you at every band.
The cleaner the source, the more your EQ moves sound like polish instead of repair.
- Set a consistent distance. Too close adds boom from the proximity effect; too far pulls in room reflections.
- Use a pop filter so plosives do not force you into heavy low-end cuts later.
- Tame the room. Even a few panels or a thick blanket behind the mic reduce the boxy reflections EQ struggles to remove.
- Pick the right mic for the voice. A bright mic on a bright singer bakes in harshness you then have to cut back out.
Cut the Problems First: Surgical EQ
Surgical EQ is about subtraction.
Before you add a single flattering boost, you remove the frequencies that make a vocal sound muddy, boxy, honky, or harsh.
Doing this first means your tonal boosts later land on a clean signal instead of amplifying problems.
Work with narrow cuts and trust your ears, because the exact frequency moves with every voice.
High-Pass Filter (Low-End Rumble)
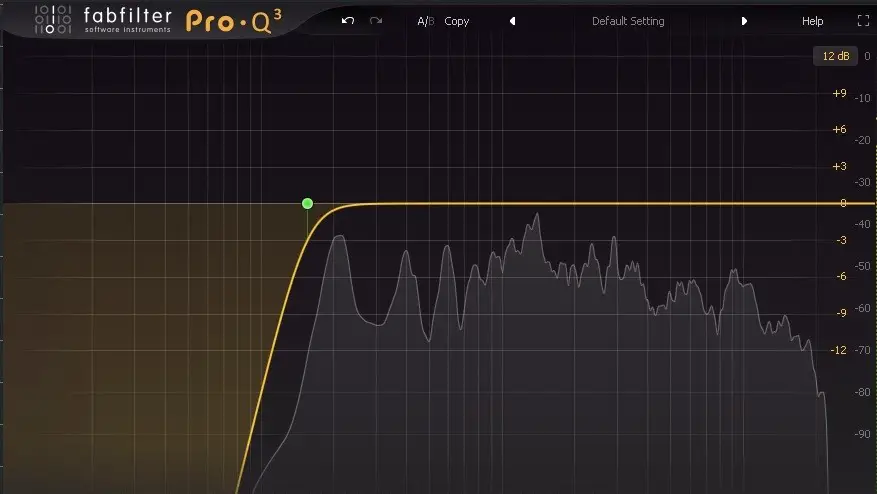
Start by rolling off the sub-frequencies the voice does not use.
A high-pass filter around 80 Hz clears out mic stand rumble, footsteps, HVAC noise, and plosive thumps without thinning the body of the voice.
On a deep male voice, you might set it lower, around 70 Hz; on a bright female voice, you can often push it to 100 Hz.
Sweep it up until the vocal starts to sound thin, then back off.
Clear Out the Mud (250 Hz to 500 Hz)
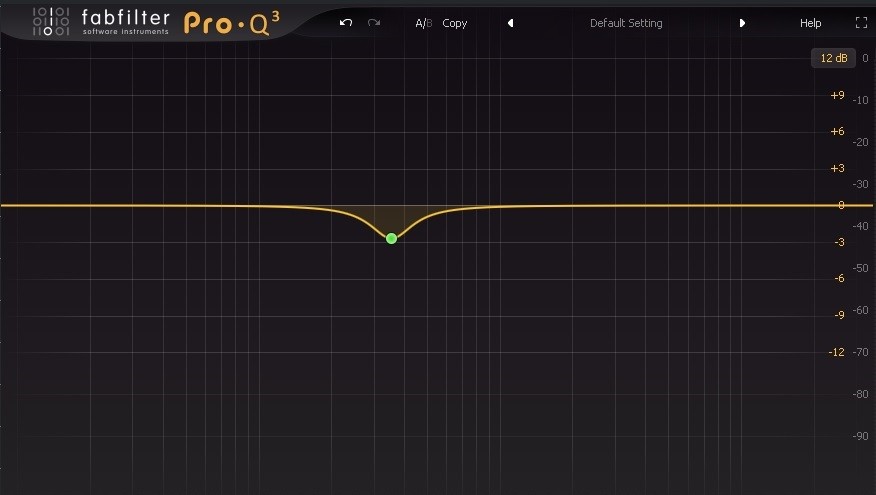
Mud lives between 250 Hz and 500 Hz, and it is what makes a vocal sound like it is under a blanket.
A cut of 2 dB to 4 dB with a medium Q usually opens the voice right up. This is the most common buildup in a dense mix, because every instrument has energy here
Cut to taste, but do not gut it, since some of that range is the warmth of the voice.
Fix a Boxy Sound (350 Hz to 600 Hz)
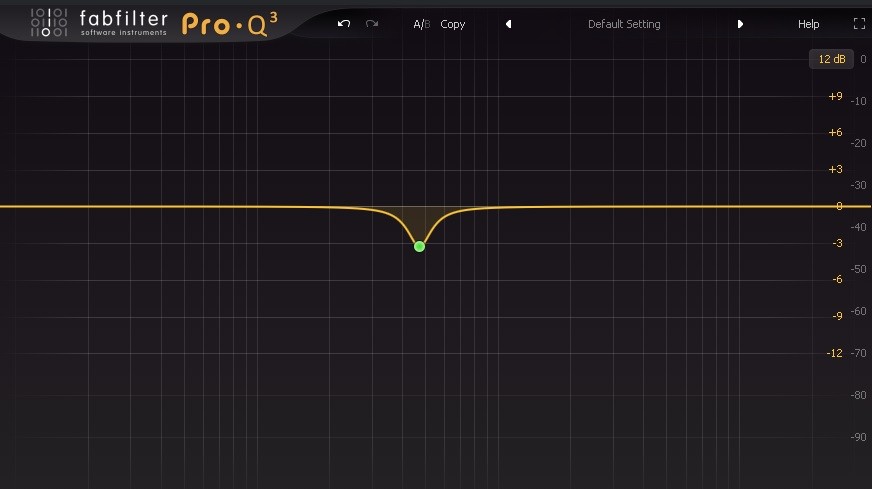
Boxiness is that hollow, cardboard quality, usually a sign of room reflections baked into the recording.
It overlaps the mud range but sits a little higher.
Sweep a narrow bell boost through 350 Hz to 600 Hz until the boxy tone jumps out, then cut a couple of dB right there.
A narrow Q keeps the cut surgical so you do not drain the body of the voice.
Tame Nasal and Honky Tones (600 Hz to 1 kHz)
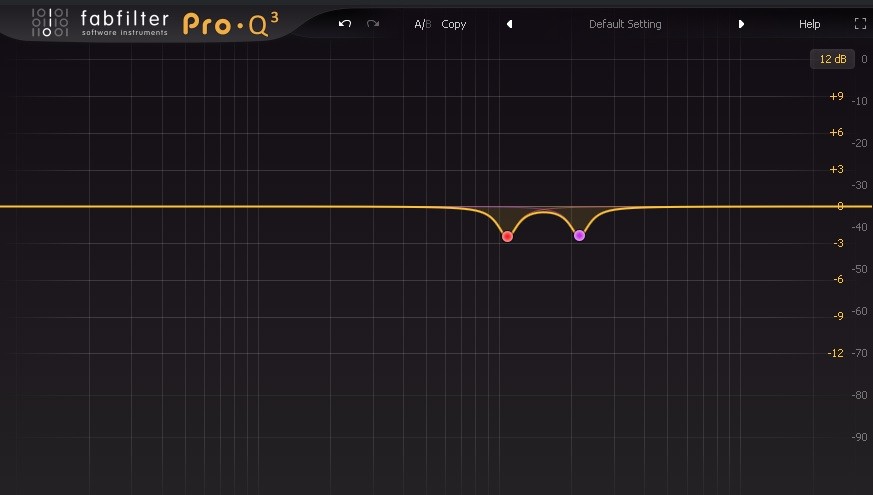
A pinched, telephone-like tone usually rings somewhere between 600 Hz and 1 kHz. Some of this is the singer’s natural voice, so be conservative.
Sweep a narrow boost to find the honk, then cut just enough to relax it.
Take too much and the vocal loses power and starts to sound recessed, so make this a scalpel move, not a sledgehammer.
Control Harshness (3 kHz to 5 kHz)
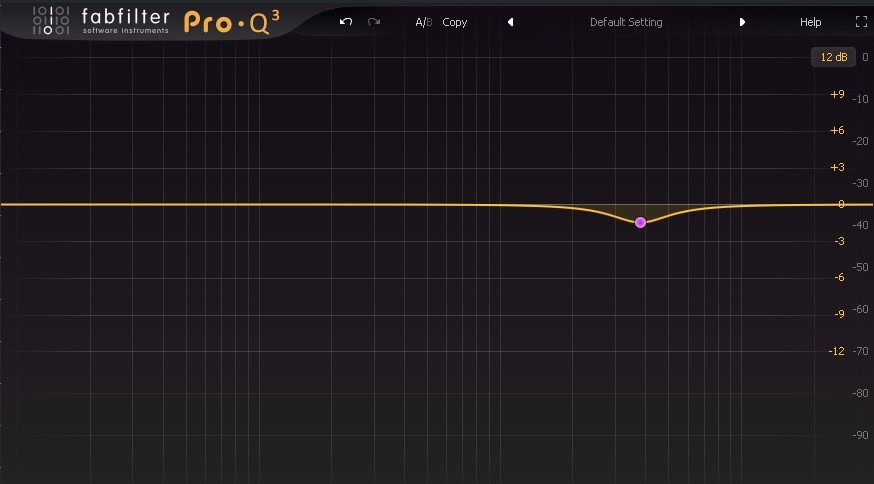
Harshness and listening fatigue usually live between 3 kHz and 5 kHz. This is the range that makes you want to turn the vocal down on loud notes.
A gentle cut of 1 dB to 3 dB takes the edge off without dulling the voice.
Be careful, because this band sits right next to the presence, so cut only what is genuinely abrasive and leave the rest for the tonal stage.
Sibilance: Use Dynamic, Not Static EQ
Sibilance, the harsh “s” and “t” sounds, lives roughly between 5 kHz and 9 kHz, but a fixed cut here is the wrong tool.
A static dip dulls the whole vocal even when there is no “s” to fight.
Reach for a de-esser or a dynamic EQ on vocals so the reduction only kicks in on the sibilant moments and leaves the rest of the high end open and bright.
The Right Order to EQ a Vocal
Order matters as much as the moves themselves.
Pros work problems first, then tone, because boosting a vocal before you have cleaned it just makes the problems louder.
There is also the question of where EQ sits relative to compression, and the answer is usually both, in two stages.
- High-pass and subtractive cuts first. Clean the signal before anything else touches it.
- A corrective cut before the compressor. Remove mud and harshness so the compressor reacts to the voice, not the problem frequencies.
- Compress to control dynamics. A consistent level makes your tonal EQ choices predictable.
- Tonal boosts after the compressor. Shape presence and air last, on a level, clean signal.
That two-stage approach is why the question of EQ before or after compression has no single answer.
A cut goes before, a boost goes after. If you want the full picture of the dynamics half of that chain, the guide to vocal compression covers how the compressor reacts to what your EQ feeds it.
One more habit that separates pros: EQ does not have to stay static across the whole song.
A vocal that needs a presence lift to cut through a dense chorus can sound too bright in a sparse verse.
Automating a band, or running a second EQ that only engages on the chorus, lets the voice sit perfectly in every section instead of forcing one setting to cover all of them.
Shape the Tone and Character
With the problems gone, this is where you make the vocal sound expensive. Tonal EQ is about gentle, musical boosts that add weight, clarity, presence, and air.
Keep the moves small, because big boosts sound processed and fake.
As iZotope notes in its breakdown of a professional vocal sound, subtlety is what separates a polished vocal from an obviously EQ’d one.
Add Weight With a Pultec-Style Boost
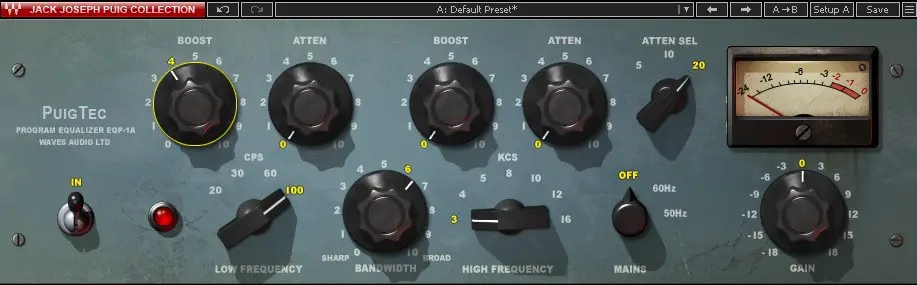
The classic Pultec trick adds low-end weight without mud.
Boost a low shelf around 100 Hz for warmth while attenuating slightly higher up, which gives a full, confident bottom end that still sits cleanly in the mix.
Many emulations of the EQP-1A do this in a single move, and most of the best vocal EQ plugins include one. Use it when a thin voice needs body the high-pass took too much of.
Improve Clarity (900 Hz to 1.5 kHz)
If the words are hard to make out, a gentle boost between 900 Hz and 1.5 kHz brings back intelligibility.
This is the range where consonants and the core of the vocal live. A lift of 1 dB to 2 dB is usually plenty.
Push too far, and the voice turns honky, so let lyric clarity be your guide rather than a number on the screen.
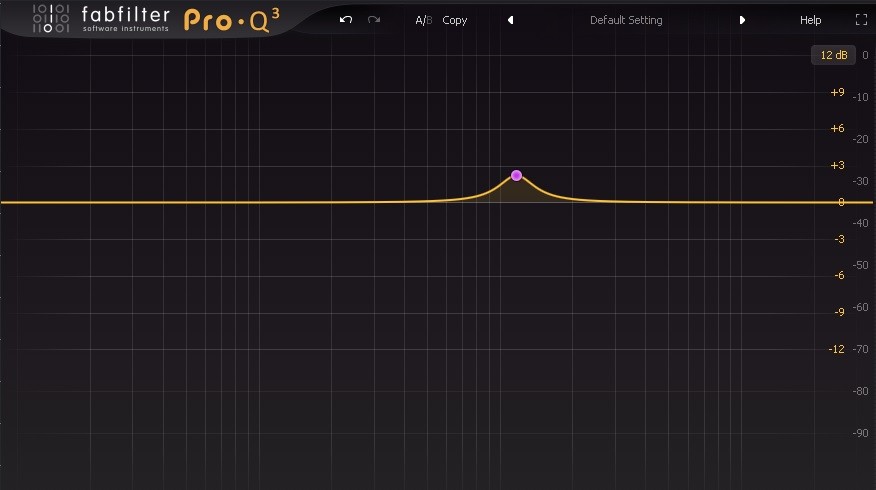
Boost Presence (4.5 kHz to 9 kHz)
Presence is what makes a vocal feel upfront and in your face.
A gentle boost between 4.5 kHz and 9 kHz pushes the voice forward in the mix without raising the fader.
Because this overlaps the harshness and sibilance ranges, make your subtractive cuts first, then add presence on top.
A broad, gentle boost sounds natural; a narrow spike sounds brittle.
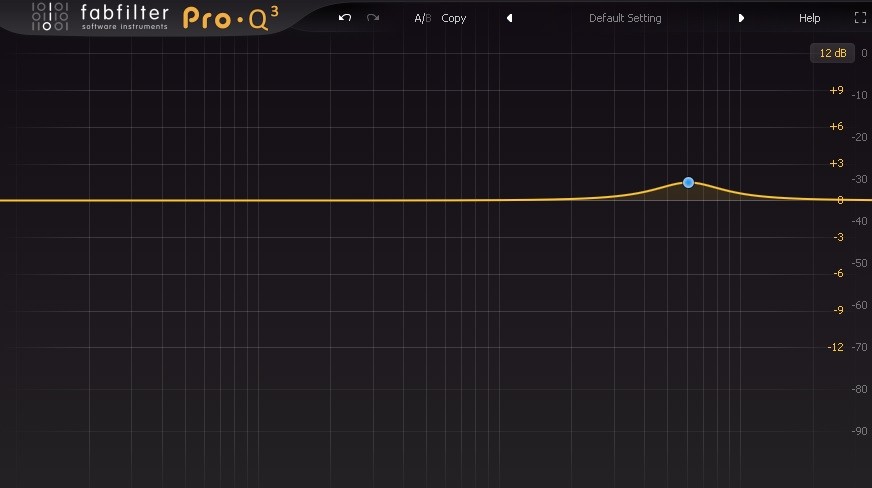
Add Air and Brightness (10 kHz to 16 kHz)
The top octave adds openness, sparkle, and the sense of breath that makes a vocal sound modern and expensive.
A high shelf boost from 10 kHz upward, even 1 dB to 3 dB, opens the voice up. Many EQs have a dedicated air band for this.
Just keep an ear on sibilance, because lifting the air can bring the harsh “s” sounds up with it.
Carve Space With Sidechain EQ
Sometimes the vocal is EQ’d perfectly and still gets buried because another instrument is fighting it in the same range.
Instead of pushing the vocal louder, you make room for it.
Sidechain EQ ducks a specific band on the competing track only when the vocal is present, so the space opens up exactly when the voice needs it and closes again when it does not.
- Find the clash. Synths, pads, and guitars often crowd the 1 kHz to 4 kHz range, where vocal clarity lives.
- Insert a dynamic EQ on the competing instrument and key it from the vocal bus.
- Dip the clashing band by a few dB so it ducks only while the vocal sings.
- Keep it subtle. A small, musical duck is invisible; a deep one sounds like pumping.
Vocal EQ Frequency Reference
Use this as a starting point, not a rulebook. Every voice is different, so these ranges tell you where to look, not exactly where to land.
Sweep, listen, and let the vocal confirm the move before you commit to it. For a stripped-down version to keep open while you work, the vocal EQ cheat sheet lists these bands at a glance.
| Target | Frequency | What it controls | Typical move |
|---|---|---|---|
| Rumble | below 80 Hz | Stand noise, plosives, room rumble | High-pass filter |
| Mud | 250 Hz to 500 Hz | Blanket-over-the-speaker thickness | Cut 2–4 dB, medium Q |
| Boxiness | 350 Hz to 600 Hz | Hollow, cardboard tone | Narrow cut to taste |
| Nasal / honky | 600 Hz to 1 kHz | Pinched, telephone tone | Narrow cut where it rings |
| Clarity | 900 Hz to 1.5 kHz | Lyric intelligibility | Gentle boost if buried |
| Harshness | 3 kHz to 5 kHz | Edge and listening fatigue | Cut 1–3 dB |
| Presence | 4.5 kHz to 9 kHz | Upfront, in-your-face quality | Broad, gentle boost |
| Sibilance | 5 kHz to 9 kHz | Harsh “s” and “t” sounds | De-esser or dynamic EQ |
| Air | 10 kHz to 16 kHz | Openness, sparkle, breath | High shelf boost |
3 Common Vocal EQ Mistakes
Even with the right ranges in front of you, a few habits quietly wreck vocals.
These are the three that trip up most producers, and all of them are easy to avoid once you know to watch for them.
1. Boosting before cutting. Reaching for a presence or air boost before you have cleaned out the mud and harshness just amplifies the problems along with the good stuff.
Subtract first, add second.
A vocal almost always sounds clearer after a few well-placed cuts than after a stack of boosts, because you are removing what was masking the voice instead of fighting it.
2. EQing in solo instead of in the mix. A vocal that sounds perfect soloed often disappears or turns harsh the moment the track plays.
EQ is about how the voice sits against everything else, so make your decisions with the full mix playing.
Solo is useful for finding a problem frequency, but the final call always happens in context.
3. Treating every voice the same. Copying a preset or a fixed curve onto every singer ignores the fact that each voice has its own trouble spots.
A bright female pop voice and a deep male rap voice need their cuts and boosts in different places, and EQ for female vocals maps the upper-midrange trouble spots this guide only touches on.
Use this reference as a map, then sweep and listen to find where this particular voice actually needs the work.
Frequently Asked Questions
These are the questions that come up most often once producers start treating EQ as a process rather than a guess.
Quick answers to each are below.
What does EQ do to vocals?
EQ adjusts the balance of frequencies in a vocal.
You use it to cut the frequencies that make a voice sound muddy, boxy, or harsh and to boost the ones that add clarity, presence, and air.
Done well, EQ helps the vocal sit clearly in the mix against the other instruments without simply turning it louder.
Should you EQ vocals before or after compression?
Both in two stages.
Put a corrective EQ cut before the compressor so it reacts to the voice rather than to mud or harshness.
Then place your tonal boosts after the compressor, on a level and consistent signal. A subtractive cut goes first, a flattering boost goes last.
That order keeps your tonal moves predictable.
What is the best high-pass filter setting for vocals?
Around 80 Hz is a safe starting point for most voices.
Go a little lower, near 70 Hz, on a deep male voice to keep its weight, and a little higher, up to 100 Hz, on a bright female voice.
Sweep the filter up until the vocal starts to sound thin, then back it off slightly. Let the body of the voice decide.
How much EQ is too much on a vocal?
If your boosts and cuts are larger than about 6 dB, you are probably fixing a recording or arrangement problem with the wrong tool.
Subtle moves of 1 dB to 4 dB sound natural, while big changes make a vocal sound processed and fake.
If you need a lot of EQ, revisit the recording, the mic choice, or the arrangement first.
Do male and female vocals need different EQ?
The approach is the same, but the focus shifts.
Male voices usually need more attention in the low end and low mids, with a slightly lower high-pass.
Female voices often need more care in the upper midrange and presence region, where harshness and sibilance can build.
The ranges in the reference still apply; you just sweep to find where each voice actually sits.
What frequencies make vocals sound clearer?
Clarity mostly lives between 900 Hz and 1.5 kHz, where consonants and the core of the voice sit, and a gentle boost there brings lyrics forward.
Presence between 4.5 kHz and 9 kHz adds the upfront quality, and a touch of air above 10 kHz adds openness.
Clean out mud at 250 Hz to 500 Hz first, since removing the clutter often does more for clarity than any boost.
The Bottom Line
EQing a vocal like a pro is not about memorizing magic numbers.
It is about a process: start with a clean recording, cut the problems before you add anything, work in a sensible order, and shape tone with small, musical boosts.
Use the reference to know where to look, then let your ears make the final call in the context of the full mix.
EQ is one stage of a much bigger picture.
The complete mixing vocals guide shows how tone sits alongside dynamics, space, and width in a finished vocal.