If you've ever wished you had a Vocal EQ cheat sheet, then you're in luck!
This post will provide you with a basic guide to equalizing a voice, as well as some tips for how to use it to your advantage.
EQ is one of the most important tools that you can use to improve the sound of your vocals. It can be used to correct problems with your vocals and to enhance the tone and color of your voice.
When done wrong, it can mess up a really good performance. This is why guides like this one are crucial.
Best Vocal EQ Cheat Sheet
As a mixing engineer, it's important to have a strong grasp of the tools available to you in the editing process.
EQ is one such tool that can be used to clean up and enhance your vocal tracks.
The following cheat sheet will give you a basic understanding of how to use EQ to get the most out of your vocals.
Let's get straight into it.
3 Steps Formula To EQ Any Vocal
Over the past few years, I've come up with a 3 steps formula that helped me finally get the best EQ settings all the time.
This is very simple and it eliminates any guesswork or over-equalizing any sound in a mix.
Here it is:
Listen > Diagnose > Fix or Enhance
Basically, I'll listen, then diagnose (to figure out if there are any problems), and finally, I'll fix what's wrong or enhance what's missing.
This way I finish mixes faster and if there's no problem I move on.
Sometimes I might move on and then hear a problem later on after mixing the other sounds that are in the mix.
The biggest mistake beginner engineers make is thinking that they'll get the perfect settings right away. Pro engineers know that they will come back later to fix any issues.
Any decisions they make are usually not the final decision. It's like writing an exam, you finish the paper and then revisit every answer when you're done.
So, always use this 3 step formula.
If you listen but can't hear anything wrong, don't feel bad or think you have to add EQ. Only apply EQ when you're 100% sure that there's a problem that needs to get fixed.
Be Bold
You need to be bold when applying EQ.
This means that if you have to create a 10dB cut or boost then do it, as long as it gives you the results you want.
People on the internet come up with ridiculous rules like "you shouldn't boost more than 3dB". If it sounds good with a 20dB cut then go for it.
Maybe that person is recording in a really good environment, so obviously, any boost or cut that's more than 3dB seems ridiculous to them. But most artists are not recording in ideal conditions.
So, trust your ears. If it sounds good, then it's good.
Avoid the Solo Button in Most Cases
When applying vocal EQ try by all means to avoid the solo button unless you want to go for a particular annoying frequency that you can't pinpoint while everything is playing.
But once you've found that certain frequency you'll need to do your EQ moves while everything is playing so that you can hear how it affects all the other sounds in the mix.
A typical listener doesn't care how the vocal sounds in solo, they listen to the whole song, not individual sounds.
Avoiding the solo button takes a lot of discipline but once you're used to avoiding it you'll start getting much better results because you'll begin to put yourself in the listener's shoes.
Using Subtractive EQ

When it comes to subtractive EQ, you need to focus on unwanted frequencies that are clashing with other sounds in the mix or ones that make it hard for the vocals to sound clear.
These are frequencies such as rumble, boominess, mud, boxiness, honkiness, nasal quality, and harshness (this includes sibilance).
If the vocal is lacking clarity then the problem is usually in the lower midrange. When it's too thick and masking the low-end then the issue is often in the sub or bass frequencies.
In some cases, the voice might be sounding too bright or edgy, then you can fix that by reducing the high midrange area.
So, you have to listen, diagnose the problem then cut until you're happy with the results.
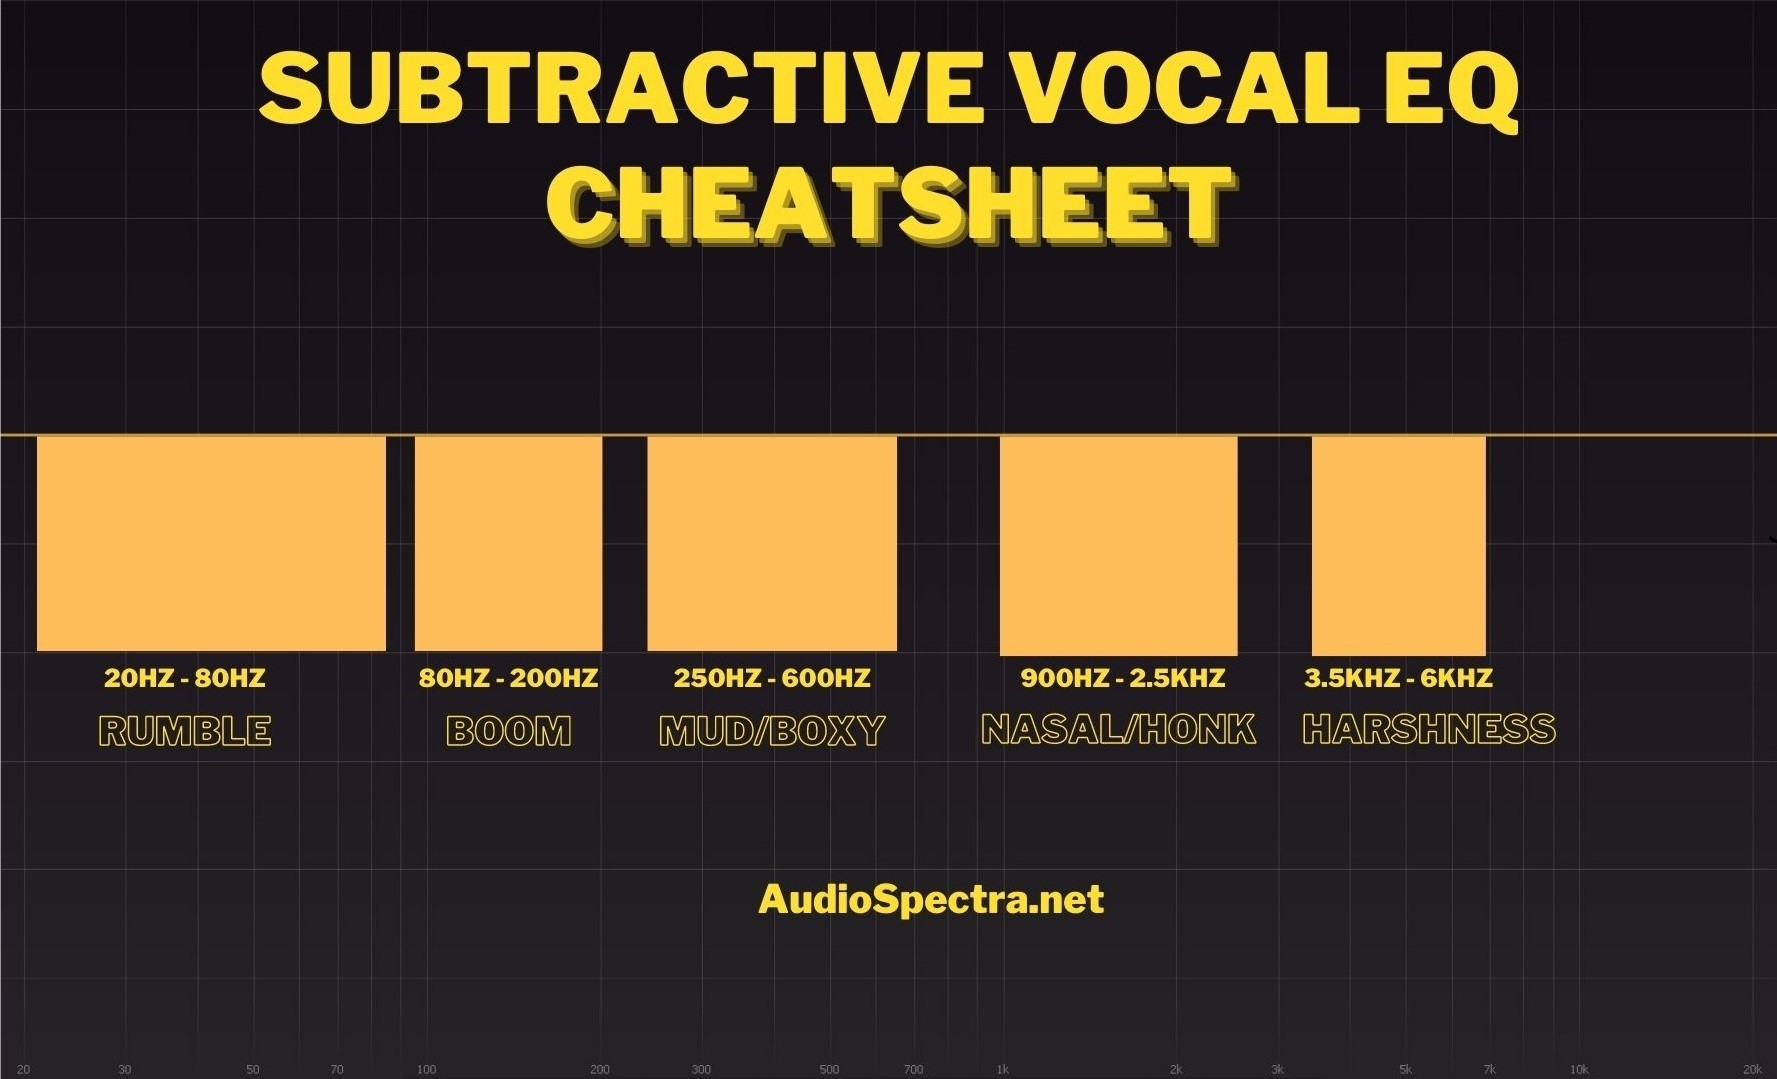
Here's a vocal EQ cheat sheet that you can use for surgical purposes.
- Rumble: 80Hz and below
- Boominess: 80Hz to 200Hz
- Mud: 250Hz to 500Hz
- Boxiness: 350Hz to 600Hz
- Honky: 900Hz to 1.5Hz
- Nasal: 1.5kHz to 2.5kHz
- Harshness: 3kHz to 6kHz
Now this EQ chart will help you find the frequency problems without guesswork.
You'll need to sweep around the spectrum to find the sweet spot and then eliminate any unwanted frequencies.
However, don't fix something that is not broken. For instance, when a vocal is already sounding too thin, in most cases, if you try to remove the mud you'll be making the situation even worse.
You should always have a valid reason as to why you're cutting out a specific frequency. Don’t do it just because you saw it on a Youtube tutorial.
Compress Before You Boost
Now before we get into the boosting part, I would highly recommend you compress after applying surgical EQ.
This will give you more control and flexibility.
If you boost then apply compression, the compressor will react to your boosts then bring them down and bring up all the quieter parts.
That will be the opposite of what you wanted to achieve when boosting certain frequencies.
But that’s just a general rule.
You have to do what works best for the song that you're currently working on. There's no one-size-fits-all when mixing music.
However, in most cases, it's better to compress before applying additive EQ.
Enhance To Bring Life To Your Vocals

A lot of beginner mixing engineers struggle with the subtractive part of EQ but the additive side of things is usually much easier for them.
When it comes to boosting frequencies, the most important thing is to figure out what the vocals are missing and then enhance those frequencies to help the voice cut through the mix.
For instance, if the vocal is sounding too dull then a boost in the high frequencies can add sparkle to the voice. When it’s sounding too thin then a boost in the bass region can add some weight.
If the vocal is struggling to cut through then a boost in the higher midrange can add clarity and presence.
So again, you listen, diagnose the problem, and then enhance.
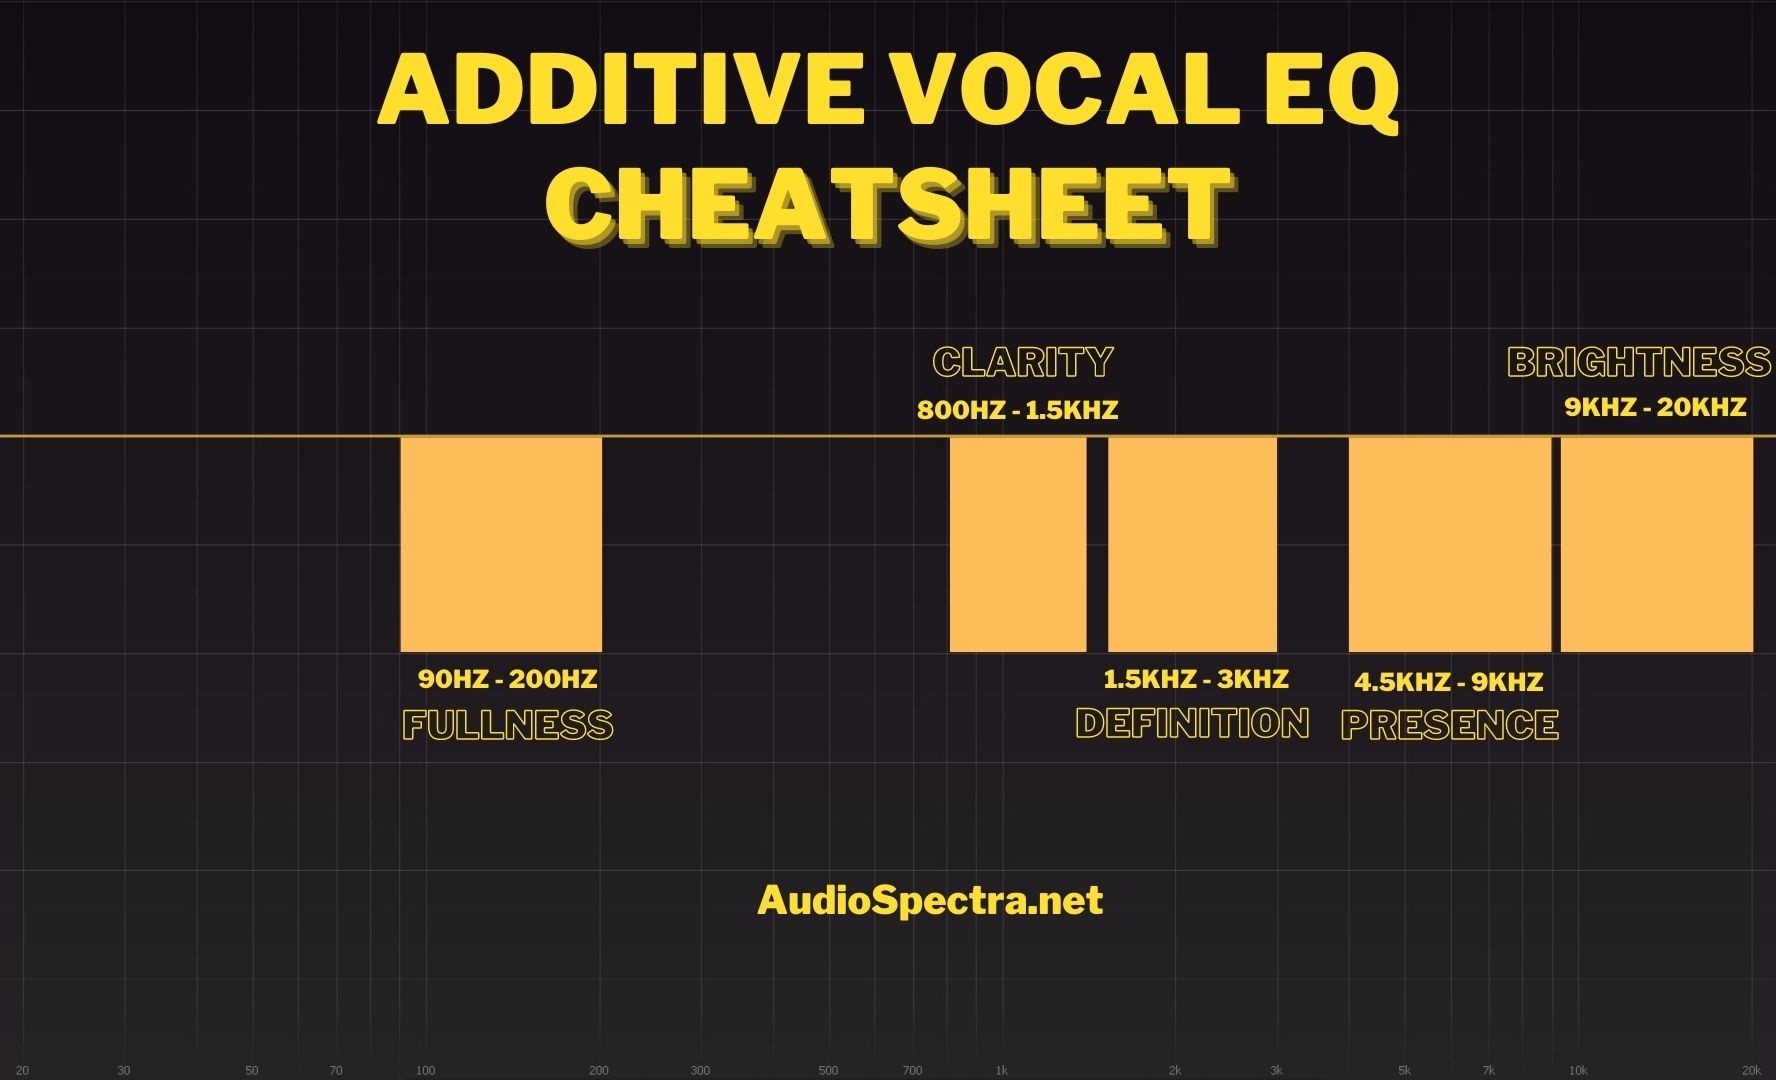
Here’s a vocal eq cheat sheet for enhancing frequencies.
- Warmth/Fullness: 90Hz to 200Hz
- Lyric Clarity: 800Hz to 1.5kHz
- Definition: 1.5kHz to 3kHz
- Presence: 4.5kHz to 9kHz
- Brightness: 9kHz to 11kHz
- Air: 12kHz +
This chart should give you a good starting point whenever you want to enhance your vocals to help them pop in a mix.
Always A/B
It’s really important to A/B test your results to figure out if what you did with the EQ is benefiting the vocals or making them sound worse.
You also need to listen to how your EQ moves are affecting everything else that’s in the mix.
Check that you’re not causing any masking, especially if the song that you’re mixing has guitars or keyboard sounds because those tend to clash with the voice.
Also, take advantage of level matching to be able to hear the before and after at the same volume.
Great EQ plugins such as FabFilter Pro-Q3 have an auto-gain feature. Use that to make sure that you’re not getting fooled by any level gain when you EQ vocals.
Know Your Tools
Knowing your tools will help you get the best results and avoid guesswork. You don’t want to find yourself confused as to which EQ you should choose.
When it comes to subtractive EQ, in most cases all you need is a stock plugin or a transparent EQ.
For additive EQ that’s when you might need a colored plugin to add some upper harmonics. This is not always necessary because in some instances, using a transparent EQ will give you better results.
You should always try to avoid over-saturating your mix because it will end up sounding thin as compared to other commercially successful songs.
The biggest beginner mistake is to add analog emulation plugins for everything. But once you read the manual and understand your tools you begin to realize that in some cases these emulations are not necessary.
So, spend time learning your tools so that you can get the best out of them without compromising your sound.
Wrap Up
It is very important to know when to cut or boost when applying vocal eq. This cheat sheet will give you a solid starting point to help you avoid guesswork.
Note that when using the EQ charts posted above, you don’t have to apply everything. Only cut or boost when it’s necessary.
If anything is confusing, leave a comment below and I’ll get back to you.
Feel free to save this post so that you can come back to it every time you’re equalizing a vocal.
